Temperature Sensors for Linux
| DigiTemp.com-->Documentation-->Building DigiTemp Temperature Sensors |
| Software | Products | Ordering | Documentation | Support | Contact |
DT-SOAW Build Instructions

|
The parts needed to build a DT-SOAW are:
|

|
Strip both ends of the telephone cable with the RJ-11 crimper/stripper. On one end cut off the black and yellow wires. Strip about 1/2 the length of the remaining red and green wires using a wire stripper and tin these 2 wires with solder. Wrap pin 3(+5v) of the DS18S20 around the back of the sensor until it touches pin 1(GND). Be careful not to short it to pin 2 (data). Solder pin 3 to pin 1 where you wrapped it around and tin the legs of pin 2 and 3 with a little solder. |

|
Place the DS18S20 face up on the work surface and solder the red wire to pin 2 (data, in the center) and the green wire to pin 1 (gnd).
Trim off any extra leads on the DS18S20, and put some heat-shrink over the top of it to keep it from flexing and breaking the solder joints. Crimp a RJ-11 connector to the other end of the telephone wire. When putting it on, look at the side of the connector with no tab and make sure the colors are: Black, Red, Green, Yellow. If you want to add the 1N5817 diode, bend it in half and solder the side with the stripe to pin 2 and the other side to pin 1 of the DS18S20. |
DT1A Build Instructions
Items needed to build a DT1A sensor are:
|
|
|
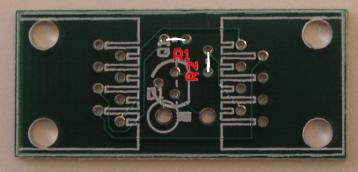
If you are building parasite powered sensors, insert the jumper wire into R1. If you are building +5v powered sensors (+5v is on pin2 of the connector) insert the jumper wire into R2.
Insert the 2 RJ-45 connectors into J5 and J6. Insert the DS18S20 sensor into Q1, oriented with the outline, Insert the optional 1N5817 diode into D1 with the stripe aligned with the outline. Flip the whole thing over, solder all the pins and repeat as needed until all your parts are used up. |